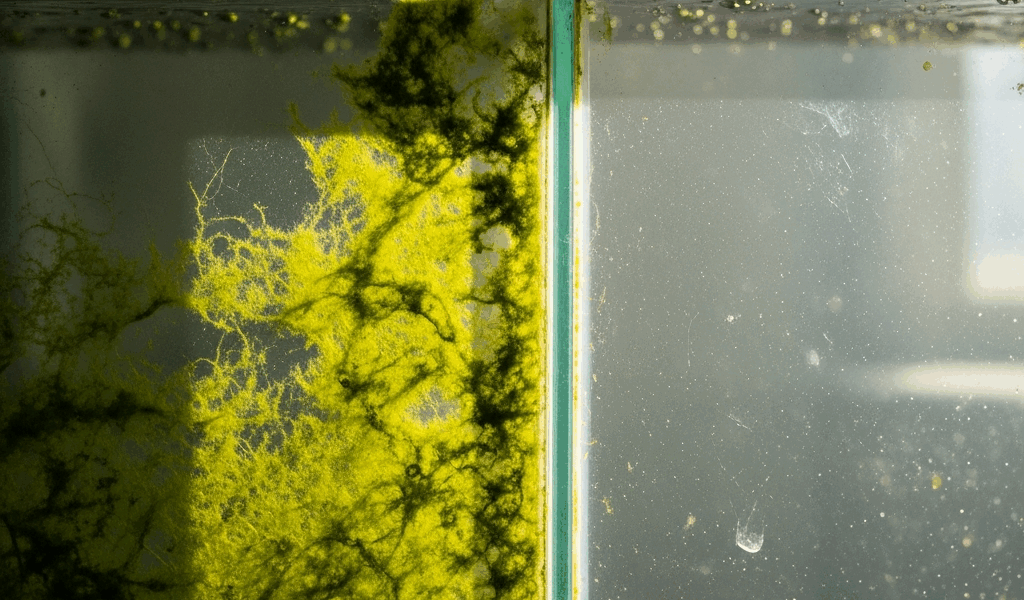
Why Freshwater Tanks Turn Green on Cruising Sailboats
Sailboat freshwater tank algae growth stops it—that’s what everyone types into their browser at 2 AM while anchored off the Marquesas wondering why their water tastes like a swamp.
Here’s the thing: your freshwater tank sits in a warm cabin, often with clear polycarbonate walls that let sunlight stream through. Unlike shore-based systems with constant water turnover and municipal treatment, a cruising boat’s tank is essentially a sealed ecosystem. Water gets drawn slowly — maybe a gallon every few days during offshore passages. That stagnation breeds algae faster than you’d expect.
Warm climates accelerate this catastrophically. I watched tanks go from crystal clear to murky green in three weeks when we stayed put in French Polynesia. The water temperature inside the cabin hovers around 78–82°F in the tropics. Algae spores — which are always present in air and water — find paradise in those conditions. They colonize the tank walls, forming a biofilm layer that’s nearly impossible to scrub away once established.
Then there’s UV light. It penetrates clear tanks far more than most cruisers realize. Even through cabin windows or translucent tank material, enough spectrum reaches the water to fuel photosynthesis. Combine that with nitrogen and phosphorus traces in the water itself. You’ve created an ideal growth medium.
Long offshore passages without taking on fresh water compound everything. The water sits completely still. No agitation. No aeration. Biofilm develops on the tank walls and around intake valves. That slime layer becomes a nursery for algae colonies feeding on trace minerals and whatever organic matter the system contains.
Early Warning Signs You Missed Before It Got Bad
Probably should have opened with this section, honestly — catching algae early saves weeks of frustration.
The smell hits first. Not quite swampy. Something closer to stale pond water or wet cardboard left in a locker. When you open a water tap and that odor comes through, algae has already established itself in the tank. I ignored this warning sign for two days on my boat thinking it was just dead air in the lines. Don’t make my mistake.
Visual inspection requires you to actually look inside the tank. Most cruisers don’t do this. Pop the inspection port or access hatch and shine a flashlight around. Green, brown, or grayish film coating the walls? That’s biofilm. White or yellowish sludge settling at the tank bottom means bacterial colonies are thriving alongside algae.
Taste comes last but screams loudest. The water develops an earthy flavor — not poisonous necessarily, but undrinkable. Some cruisers report a metallic tang or slight bitterness. That’s the algae metabolizing and releasing compounds into the water. Your tongue is a sensitive detection tool. Use it.
Discoloration progresses through stages. Cloudy water that clears after sitting indicates particulate matter and early biofilm. Persistent green or brown tint means algae colonies are mature. Water that looks almost opaque? You’re beyond early intervention.
One critical warning: don’t drink it and hope your gut flora handles it. Some algae species produce mycotoxins that can cause gastric distress. Not life-threatening usually, but offshore when you’re already dealing with seasickness and salt-water sores, drinking contaminated water pushes your body over the edge.
Immediate Removal Steps When Algae Blooms
Faced with a tank full of algae-laden water, you need to act deliberately. No panic required, but speed matters.
First, isolate the tank. Close the seacock or valve feeding your main water supply. You don’t want contaminated water entering your system any further. If you have multiple tanks — many cruising boats do — identify which one harbors the bloom and work there exclusively.
Drain what you can safely. This is where space constraints bite. A 60-gallon tank on a 40-footer represents serious freshwater cargo. You might be 400 miles from the nearest port. Can you afford to dump 60 gallons overboard? Some cruisers would say yes instantly. I’ve done it. Others cannot — they’ve worked too hard to collect that water. Accept the reality: you might not drain the entire tank, especially mid-passage.
Flush with whatever water you have. Use seawater if the tank is designed for it, or sacrifice precious freshwater if that’s your only option. Run water through at pressure to dislodge the biofilm. Most polyethylene tanks can handle moderate force without rupturing — just don’t use a high-pressure washer.
Scrub the interior. This demands physical entry or a flexible brush system. I’ve climbed into my own tank once. Uncomfortable doesn’t cover it, but necessary. You’ll feel the slimy film on tank walls. A soft-bristled brush removes it better than aggressive scrubbing, which can leave micro-scratches that algae loves. Work the entire interior surface, especially the bottom and corners where sediment accumulates.
Address the intake valve. Algae loves to coat these. Disassemble if possible and soak the valve assembly in diluted bleach solution — 1 part household bleach to 10 parts water — for thirty minutes. Scrub gently with a toothbrush and flush thoroughly with freshwater before reinstalling.
Treat with biocide. After physical removal, add a measured amount of household bleach to kill remaining spores. Standard dosing is 1 teaspoon per 10 gallons of tank capacity. Dissolve the bleach in a cup of water first, then distribute through the tank. Let it sit for two hours, then flush completely until no chlorine smell remains. Under-flushing leaves chemical taste that’s almost as bad as algae.
Consider disposal responsibly. Algae-laden water dumped overboard won’t damage the ocean, but some ports have regulations. In enclosed anchorages — Mediterranean harbors, narrow Caribbean bays — ask before dumping. Most open-water situations pose no issue.
Long-Term Prevention for Extended Cruises
Removing algae once is annoying. Removing it repeatedly is maddening. Prevention strategies matter more than cures.
Tank material selection matters tremendously. Opaque polyethylene or aluminum tanks resist algae growth far better than clear polycarbonate. If you’re specifying a replacement tank, go dark-colored. If you’re stuck with a clear tank, wrap it with reflective material or paint it. Loss of visibility into the tank’s contents is worth the algae prevention.
Chemical maintenance routines save time. Add 1 teaspoon of household bleach per 50 gallons every four weeks when cruising tropics. This keeps spore counts low before blooms establish. Some cruisers use commercial additives like Microbac — about $12 per bottle online — which work similarly. The key is consistency, not perfection. I maintained this schedule religiously in the South Pacific and never had a repeat bloom.
UV sterilizers exist and work. These inline systems cost $150–400 and run off 12V power. Water passes through a chamber exposed to UV light that kills algae spores. Effective, but they require regular bulb replacement and consume battery power. Most bluewater cruisers skip them due to electrical constraints unless running substantial solar arrays.
Circulation prevents stagnation. A small 12V circulation pump that runs for 30 minutes daily keeps water moving slightly, disrupting biofilm formation. Less practical on small boats with limited power, but worth considering if you have excess solar capacity.
Monitor tank levels and usage patterns. When you run water through regularly, algae has less time to establish. If you’re anchored and conserving water, you’re creating ideal conditions for blooms. Conscious usage — actually using your water instead of hoarding it — prevents stagnation.
Accept that perfect prevention is impossible. Six months offshore, you will eventually contend with some level of algae activity. Plan for it. Keep bleach aboard. Know your tank access points. Don’t let a small bloom become a crisis by ignoring early signs.
When to Replace Your Tank Instead of Fighting It
Some tanks degrade beyond reasonable maintenance. Polyethylene tanks typically last 15–20 years in marine service. Older tanks develop microscopic cracks and surface degradation that harbor algae permanently. You can scrub, treat, and dose all you want — the contamination returns within weeks.
Signs your tank is approaching end-of-life: persistent algae despite aggressive treatment, cracks visible on interior surfaces, tank walls that feel soft or spongy when compressed, or chemical treatment that produces rotten-egg odors. That last one indicates sulfide-producing bacteria colonizing deep material degradation.
Replacement costs vary wildly. A 40-gallon food-grade polyethylene tank runs $120–200 online. Installation — cutting it into your boat, fitting connections, testing — might require professional help at $400–800 depending on your boat design and local labor costs. Budget $600–1,000 total for straightforward replacement on a small cruiser.
The decision calculus is straightforward: if you’re spending 8+ hours monthly combating algae blooms in a tank that’s already 18 years old, replacement makes financial and practical sense. If your tank is relatively new but in a warm climate, ongoing prevention is more cost-effective than ripping out and replacing functional equipment.
Tank replacement also offers an upgrade opportunity. Install an opaque tank. Add a circulation pump during the refit. Consider multiple smaller tanks instead of one large one, reducing stagnation risk. These improvements prevent future algae disasters, making the replacement investment pay dividends over years of cruising.



Stay in the loop
Get the latest sail the seas mag updates delivered to your inbox.