Why Your Bilge Pump Stops Working
Bilge pump troubleshooting has gotten complicated with all the conflicting advice flying around. As someone who’s crouched in a flooded cabin at 2 AM watching water creep up the sole while an electric pump sat completely dead, I learned everything there is to know about this subject. Today, I will share it all with you.
But what is a bilge pump failure, really? In essence, it’s one of three things: a jammed or corroded float switch, a broken electrical circuit, or a clogged and burned-out impeller. But it’s much more than that — it’s a diagnostic puzzle you have to solve in sequence, not by gut feeling.
Offshore, a dead bilge pump isn’t inconvenient. It’s dangerous. Modern sailboats still leak. Even a well-built hull weeps around through-hulls and shaft logs. Without a working pump, you’re bailing by hand or abandoning the vessel entirely. So, without further ado, let’s dive in.
Step 1 — Check the Float Switch First
Start here. The float switch dies more often than the pump itself — at least in my experience — and testing it takes nothing more than a multimeter and the willingness to get your hands into a wet bilge.
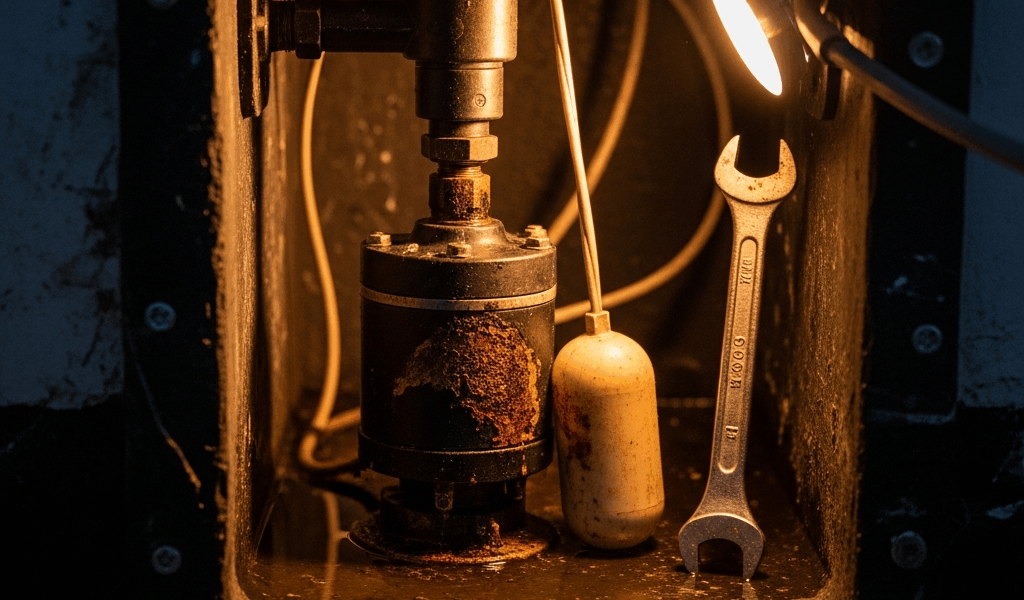
Find your bilge pump switch. On most cruising sailboats, it mounts directly on the bilge sump or nearby on the cabin sole. Plastic or brass housing, two or three wires coming out. That switch — mechanical or electronic — is what tells the pump to run. When it quits, the pump never gets the signal.
Mechanical Float Switches
The mechanical type uses a hollow float ball connected to a mercury or ball-bearing switch inside a lever arm. Water rises, float rises, lever tilts, contact closes. Simple design. Fragile execution.
Pop the housing open. Look for corrosion first — white or blue-green crusty deposits on the lever or inside the switch cavity. Salt spray gets everywhere, especially down in the bilge where humidity is genuinely brutal. I once found a float switch where someone had paired a stainless fastener with an aluminum bracket. Two seasons. The galvanic reaction ate straight through the mechanism. Don’t make my mistake.
If you see corrosion, scrub the interior gently with white vinegar and a soft brush. Rinse with fresh water. Then test the float manually — it should travel smoothly up and down without catching. A stuck float never triggers the switch. You get a flooded bilge while the pump does absolutely nothing.
Check the float ball itself for cracks or water intrusion. A waterlogged float won’t rise correctly. Replacement runs about $12 to $25 for most models and costs far less than chasing phantom electrical gremlins for three days.
Electronic Float Switches
Newer boats often run electronic sensors instead — no moving parts, just a capacitive or magnetic switch triggered by water level. These fail differently. A corroded connector or water intrusion into the switch body kills them instantly, no warning.
Inspect the connector terminals closely. Green with verdigris? Disconnect them, clean with fine sandpaper or a contact spray like CRC 6-56 — the 11-oz aerosol runs about $8 at West Marine — dry thoroughly, then reconnect and retest.
Bypass Test
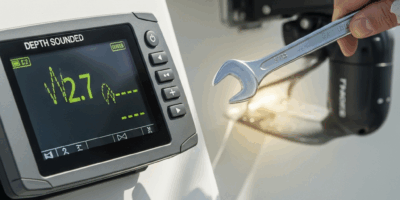
Here’s the move that saves hours of unnecessary work. Manually jump the float switch terminals to see whether the pump actually runs.
Find where the switch wires connect to your main electrical panel or pump relay. Take two insulated jumper wires and touch them to the two float switch terminals. Pump kicks on? Your switch is dead. Order the replacement and you’re done diagnosing. Pump stays silent? The problem lives downstream — wiring or the pump itself.
That’s what makes this single test so endearing to us troubleshooters. One move, half your variables gone.
Step 2 — Test the Fuse and Wiring Circuit
Assuming the float switch cleared, look at the electrical circuit. Every bilge pump runs on a dedicated fuse at the main panel — usually 10 or 20 amps depending on the pump’s draw. A blown fuse cuts everything instantly.
Find your fuse block and pull the bilge pump fuse. Inspect it. Blown fuses show a broken or blackened element inside the glass or plastic tube. Swap it for an identical amperage. If the replacement blows immediately, you have a short somewhere and you should stop running the pump until you find it.
Fuse looks fine? Grab the multimeter. Set it to DC voltage. Black probe to a clean ground — the negative battery terminal or the ground bus works — red probe to the positive terminal at the pump itself. You want 12 volts DC, or 24V on larger yachts.
No voltage? Your wiring is broken somewhere. Switch the multimeter to continuity mode and test between the fuse block and the pump. Near zero ohms means the wire is good. High resistance or an open reading means a break or severe corrosion somewhere along the run.
Now check the ground wire. Bilge pumps fail silently all the time because the negative wire corrodes through. Test continuity between the pump’s negative terminal and the battery negative. Same target — near zero ohms. An open circuit reading means a bad ground.
Look at every inch of visible wiring in the bilge. Saltwater and diesel fuel eat through insulation faster than you’d expect. I’m apparently hard on bilge wiring — a pump wire on my previous boat rubbed through on a sharp aluminum fitting and exposed bare copper to bilge water. The pump ran intermittently for weeks before I traced the corrosion back to that spot. Frustrating doesn’t cover it.
Watch for melted or blackened insulation near the pump or relay. That’s heat damage — usually a relay that’s been arcing internally for a while.
Step 3 — Inspect the Pump Impeller and Through-Hull
The pump itself fails two ways: mechanical blockage or burnout. They feel different and fix differently.
Start at the through-hull discharge. Follow the discharge hose from the pump overboard. If the boat spent time in warm anchorages, marine growth — barnacles, zebra mussels, soft corals — can completely seal the outlet. After a long offshore passage I once found a 1.5-inch discharge pipe packed solid with kelp and sediment. The pump sounded perfectly healthy. Zero water came out. That’s a maddening problem to diagnose.
Disconnect the discharge hose at the fitting closest to the through-hull. Look inside with a flashlight. Sediment, slime, visible growth — any of it means the outlet is blocked. Flush it with a garden hose or clear it gently with a wooden dowel. Avoid wire brushes entirely. You can crack the through-hull fitting and create a much worse situation.
Now check the intake side. Most bilge pumps sit in a sump or strainer basket, and the intake strainer catches debris — hair, paper scraps, sand, plastic bits. A clogged strainer forces the pump to work against restricted flow. It overheats. The impeller fails. Quietly, usually at the worst possible moment.
Pull the strainer basket if you can reach it. Rinse it under fresh water. If it’s packed with sediment or matted with fibrous material, that’s your answer — the pump was starved. Clean strainer, test again.
Check the impeller housing for debris. On many pumps you can see the impeller from the outlet port. A burned-out impeller looks scorched — blackened or melted plastic on the blades. It also smells acrid, distinctly chemical. A seized impeller won’t turn at all when you try to spin it by hand.
Burned impeller means pump replacement. Dry running destroys impellers in minutes. It happens when the intake clogs and the pump spins against zero flow, generating heat with nothing to cool it. Five minutes of dry running can kill a $180 pump completely.
Emergency Manual Pump Override for Bluewater Sailors
Probably should have opened with this section, honestly. If the electric system is completely dead and water is actively coming in, you need a manual backup running immediately.
Every offshore boat should carry a manual diaphragm bilge pump — the old lever-action type that runs entirely on human effort. Mount it where you can reach it from the cabin sole without hunting for it. Know how to use it before you need it. In a real emergency, there’s no time to read instructions or figure out the valve orientation.
Most manual pumps use a simple up-and-down lever motion — pump the handle and water flows overboard through a one-way valve. That’s the whole mechanism. Practice it in calm weather so the motion is automatic when conditions aren’t calm.
A quality manual pump — Whale Gusher Mk3 or Flojet models run roughly $300 to $600 — moves enough volume to outpace most hull leaks. Pair it with 50 feet of intake hose that reaches every low point in the bilge.
Once the electric system is repaired, test it weekly under real conditions. Don’t just flip the switch and listen for the motor. Go outside and verify water actually exits the through-hull. I’m apparently the kind of sailor who skipped this check for an entire season — and CRC works for me now while the “listen and assume” method never did. Many sailors discover their electric pump is dead only at the moment they need it most because discharge flow was never confirmed.
One more discipline worth building: pour water into the bilge sump monthly until the float switch triggers and the pump kicks on. Inspect all wiring terminals every season before you leave the dock. Know your pump’s rated cycle life — most residential-grade units fail around 500 hours of runtime, which isn’t much if your hull weeps constantly. Upgrade to a marine-duty continuous-cycle unit if you’re planning ocean passages.
Your bilge pump isn’t glamorous. But it’s the difference between a wet boat and a sunken one.


Stay in the loop
Get the latest sail the seas mag updates delivered to your inbox.