How to Tell If Your Sailboat Fuel Is Contaminated
Sailboat fuel contamination has gotten complicated with all the bad advice flying around — half of it written by people who’ve never actually been offshore when their engine starts dying. As someone who limped a Valiant 40 through the Gulf Stream in 2019 with a stuttering engine and no good options, I learned everything there is to know about diagnosing contaminated diesel at the worst possible moment. Today, I will share it all with you.
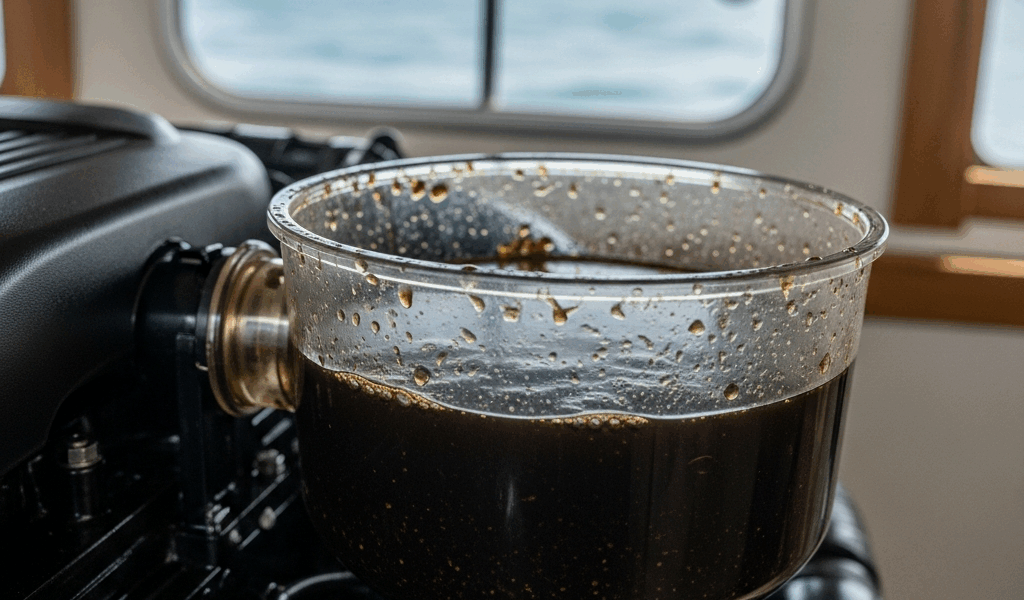
The first sign is usually something you see. Open the fuel filler cap and look down into the tank opening. Healthy diesel runs amber or golden-brown — clean, almost pretty. Contaminated fuel looks like weak tea that’s been sitting out for a week. Darker cases go nearly opaque, with a cloudiness that catches light strangely. Sometimes there’s actual black sludge coating the underside of the cap or the filler neck itself. That’s your answer right there.
Below deck, smell becomes your next clue. Fresh diesel has that neutral, faintly sweet petroleum scent. Contaminated fuel — especially anything with active microbial growth — stinks. Sulfurous. Rotten. Like something crawled into your tank and died. Which, technically, something might have.
Engine behavior gives you a third layer of diagnosis. The symptoms cluster around fuel starvation and filter stress:
- Sputtering or hesitation under load, but not at idle
- Black sediment caking your primary fuel filter after just a few hours of running
- Secondary filter clogging every 50–100 hours instead of the normal 500
- Rough running that clears briefly after a filter change, then returns within days
That last pattern — temporary improvement, rapid decline — tells you everything. The filter is catching symptoms, not fixing the disease. Your tank is the disease.
What Causes Fuel Tank Contamination on Sailboats
Four contamination pathways exist. Water intrusion happens fastest. A cracked deck fill cap O-ring, a loose cap left unsecured during a rain squall, condensation from temperature swings — any of these introduce moisture. Even saltwater spray settling into an open filler during a rough mooring is enough. That water sinks to the tank bottom because it’s heavier than diesel. It pools exactly where your fuel pickup draws from. Not great.
Microbial contamination — what sailors call the diesel bug — kicks off when airborne spores land in water that’s already pooled at the bottom. Bacteria and fungal organisms breed in the boundary layer between fuel and water, consuming diesel and producing sludge. It accelerates in warm climates and in partially filled tanks left sitting undisturbed for months. I’ve watched this destroy a 60-year-old boat’s fuel system in a single Bahamas season. One season.
Rust particles and corrosion byproducts shed from uncoated steel tank interiors or corroded fuel lines are a slower, nastier problem. Older steel tanks especially. The rust doesn’t just float around harmlessly — it becomes a surface where microbial growth anchors and spreads.
Cross-contamination happens when you source fuel from a questionable dock or a supply vessel running its own contaminated tank. That’s the bluewater wildcard. You’re relieved to find fuel at all in some remote port, you fill up, and you’ve just inherited someone else’s problem. Instantly. That’s what makes contaminated fuel so endearing to us offshore sailors — it always finds the worst possible moment to show up.
Step-by-Step Fix for Contaminated Diesel Fuel
Probably should have opened with this section, honestly. Most sailors want the action items first. The why can wait.
Assuming you’ve confirmed contamination and you’re either at anchor or making for port, here’s the sequence.
- Stop drawing from the contaminated tank if you’re still underway. Switch to jerry cans immediately. Even 5–10 gallons of clean fuel buys you time — enough to reach safe harbor without circulating more sludge through your injectors.
- Change both primary and secondary fuel filters. Use OEM or equivalent quality — no shortcuts. On a Yanmar 2GM20F, that’s a 104500-55700 primary and a 128270-55620 secondary. Write down your engine’s model number before you need it, not during a crisis. Filters run $35–$60 each. Carry spares on every offshore passage. Non-negotiable.
- Transfer the contaminated fuel out into a waste container. You’ll need a clear 3/8-inch fuel transfer hose — at least if you want to actually see the fuel color as you’re pumping — a hand pump or 12V electric transfer pump ($40–$150), and a sealed 5- or 6-gallon waste fuel jug. The clear hose matters. You watch the color improve in real time. Start with a hand pump if you have one; slower, but it doesn’t require electrical troubleshooting when your batteries are already stressed.
- Inspect the tank interior if access allows. Many sailboats have a removable inspection port on the tank top. Shine a flashlight in. Black sludge coating the bottom means you’re dealing with something deeper. Relatively clean tank bottom means you caught it early — a genuinely good day offshore.
- Treat with biocide. Biobor JF is the standard — one bottle treats 250 gallons, costs around $35, and has been around long enough that I’d trust it over anything with a flashier label. Pour it in, run the engine 20 minutes to circulate it, then let it sit 12–24 hours. Skipping this step guarantees recurrence within weeks. Don’t make my mistake.
- Refill with fresh diesel from a reputable marine fuel dock. Not a gas station. Marine diesel already carries additives. Fill the tank full — this reduces condensation space and functions as preventive medicine baked into every fill-up.
The whole process takes 2–3 hours if you’re methodical. So, without further ado, let’s keep moving.
Cleaning a Diesel Tank That Has Algae or Sludge
But what is fuel polishing, really? In essence, it’s a filtration loop that cleans fuel in place. But it’s much more than that — it’s often the only option when sludge has caked the tank bottom and simple pumping won’t shift it.
The setup uses a transfer pump and filter housing arranged in a loop: pump from the tank through a 10-micron filter element, then back into the tank. A Floscan fuel flow gauge — about $60 — helps you monitor progress. As the filter loads with sludge, flow drops. Change the element when flow falls below 5 gallons per minute. Repeat 3–5 cycles until the return fuel runs clear. For a 40-gallon tank, budget 8–12 hours of run time spread across multiple days. It’s not exciting work. It’s effective work.
Fiberglass tanks are forgiving — smooth interior, sludge doesn’t bond permanently. Aluminum tanks corrode and develop rough surfaces where sludge grabs hold. I’m apparently on my second aluminum tank and professional steam cleaning works for me while DIY polishing alone never fully cleared the pitting on the first one. Aluminum may demand professional intervention if corrosion has progressed.
Professional tank cleaning — vacuum extraction, mechanical scrubbing, passivation treatment — runs $800–$2,000. Warranted if you find visible corrosion pitting, if DIY polishing hasn’t cleared sediment after 40+ hours, or if you’re dealing with confirmed saltwater intrusion damage. For cruising boats headed to remote areas, that peace of mind justifies the cost. For daysailers, DIY polishing usually suffices.
Preventing Fuel Contamination Before Your Next Passage
Prevention compounds over time. Miss one step consistently and problems build. Do all five consistently and they essentially disappear.
- Keep tanks full in storage. A full tank has minimal air space — temperature swings can’t create meaningful condensation. Filling before a long haul-out or winter shutdown takes ten minutes and saves hours of headache later.
- Inspect and replace deck fill O-rings annually. That rubber seal costs $8. The replacement takes maybe 10 minutes. Deteriorated seals let rain and spray in consistently — one of those slow, quiet problems that turns catastrophic offshore.
- Add biocide to every fill-up in tropical climates. One tablespoon of Biobor JF per fill-up in the Bahamas or Caribbean prevents microbial colonization before it starts. This is insurance, not treatment. The distinction matters.
- Install a clear primary fuel filter bowl. A transparent bowl ($50–$100) lets you spot contamination visually before symptoms reach the engine. I installed one before a 2021 passage and caught black fuel in the bowl one morning — addressed it before the engine showed a single symptom. That clear bowl paid for itself immediately.
- Carry spare filter elements — always. Minimum two full sets of primary and secondary filters for any offshore passage longer than three days. Not a suggestion.
Bluewater sailing means you can’t call a mechanic. You are the mechanic. Carry spare fuel filters the way your ancestors carried spare sails — because out there, they’re equally essential.


Stay in the loop
Get the latest sail the seas mag updates delivered to your inbox.