“`html
Why Galley Stoves Rust Faster on Sailboats
Saltwater galley stove rust prevention has gotten complicated with all the misconceptions flying around. I spent a summer cruising the Chesapeake watching my vintage Force 10 stove deteriorate, thinking sea air was just aesthetic. Today, I’ll share what I learned. The reality is brutal: a galley stove deteriorates three to four times faster on a boat than it would sitting in a coastal home kitchen.
Salt spray is the obvious culprit — when waves break against the hull or you motor into a headwind, sodium chloride particles become airborne. They’re microscopic, penetrating every seam, every burner valve, every gap in your stove’s structure. Salt alone wouldn’t be catastrophic. It’s the combination that kills equipment.
Humidity compounds everything. Below deck on a sailboat, relative humidity sits between 70 and 90 percent most of the time. Cook pasta for dinner, and you’ve just pumped moisture directly into the galley space. That water vapor condenses on metal overnight. Repeat this cycle daily, and you’re essentially running a corrosion accelerator with thermodynamics doing the heavy lifting.
Temperature cycling is the third component. Your cabin might be 65°F at dawn, heat to 75°F by afternoon, then cool to 60°F at night. That expansion and contraction stresses paint coatings and creates micro-fractures where moisture penetrates. Cast iron and bare steel don’t stand a chance without intervention — they’re sitting ducks.
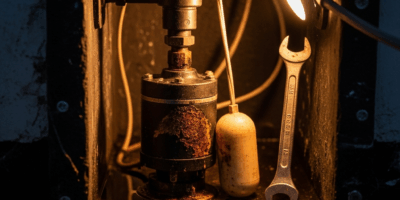
Lack of cabin ventilation amplifies the damage exponentially. Most sailors underestimate how little air moves below deck. A single opening porthole and a cabin vent aren’t enough. Stagnant air traps salt particles and moisture directly against your stove’s surfaces. I’ve seen fuel line corrosion get so bad that salt accumulation actually restricted fuel flow — a safety hazard on top of equipment failure.
The emotional reality hits different: a failed galley stove means cold food, meal prep frustration, and mounting irritation when you’re 50 miles from the nearest harbor with hungry crew.
Daily Wipe Down and Moisture Control
Probably should have opened with this section, honestly. Every single meal prep cycle creates an opportunity to prevent rust, and most sailors miss it entirely.
Immediately after cooking — while the stove is still warm but cool enough to touch safely — dry the entire stove surface with a microfiber cloth. Not a paper towel. Microfiber cloth. The kind used for car detailing costs about $4 per cloth at West Marine (part number 11477100 in their catalog, though any marine supplier carries equivalents). These cloths absorb moisture far better than cotton or paper, and they’re gentler on protective coatings.
Wipe the burner grates, the flat cooking surface, all valve handles, and especially the seams where the burner assembly meets the stove body. Those seams trap moisture and salt crystals. Spend 60 seconds here. That’s the highest-risk zone on your entire stove.
Water displacement spray comes next. WD-40 Marine — not standard WD-40, the marine formula is crucial — costs around $8 per 8-oz. can, but one can lasts two to three months on a galley stove with daily use. Spray it on a cloth and wipe down all exposed metal surfaces. You’re not trying to soak the stove. Light application. The goal is displacing surface moisture and creating a thin hydrocarbon barrier against salt air.
Cabin ventilation during and after cooking prevents moisture accumulation in the first place. Open your forward hatch while cooking. Run a cabin fan directed toward the galley if you have one. Leave these open for 20 to 30 minutes after finishing. Yes, this means brief cold air influx. Accept it. The alternative is corrosion that spreads through your fuel system and compromises safety.
Make this a non-negotiable habit. The stove stays rust-free because of this daily routine, not despite it.
Seasonal Deep Maintenance for Stove Components
Spring and fall maintenance windows are when you disassemble, address accumulated damage, and recoat components. Timing matters — do this before your longest passages or winter storage.
Start by removing the burner grates and pot supports. On most marine stoves, this requires only removing two to four bolts per component. Document the configuration with photos so you remember how pieces fit back together. I made the mistake of removing grates and supports without photographing first, then wasted an hour figuring out orientation. Don’t make my mistake.
Inspect each component under good light. Look for surface rust (orange-brown discoloration), pitting (small holes), or white crystalline deposits (salt corrosion). Surface rust requires mild intervention. Pitting requires replacement.
Naval jelly — ferric phosphate paste — costs roughly $6 per 16-oz. jar and works on surface rust effectively. Apply it with a brass brush (never steel wire on marine stoves, steel causes galvanic reactions with stainless steel). Let it sit for 30 minutes, then scrub and rinse thoroughly. The rust converts to a dark coating that’s actually protective. Wipe dry immediately afterward.
For stainless steel components, use stainless steel polish afterward. Camco Stainless Steel Cleaner & Polish runs about $7 per bottle. This removes any residual corrosion particles and adds a light protective layer. Polish in the direction of the grain, not circular motions — that’s the difference between a professional finish and amateur work.
Valve handles and control knobs benefit from food-grade mineral oil after cleaning. A light coating prevents moisture from re-settling on these high-use components. One $5 bottle of food-grade mineral oil lasts years, probably longer than you’ll own the boat.
Reassemble everything, ensuring bolts are snug but not over-tightened (cast iron cracks easily). Test that all controls move smoothly before you call the job done.
Protective Coatings That Actually Hold
Three coating methods exist for galley stoves. Understanding which works requires knowing how each handles heat and salt exposure.
Traditional enameling — the factory finish on most quality stoves — involves fusing a glass-like coating to the metal base at high temperature. This works because the coating bonds at a molecular level. It survives cooking heat. It resists salt spray effectively. That’s what makes factory enamel endearing to sailors. The problem: once enameling chips, water penetrates the bare metal underneath and spreads sideways beneath the coating. You can’t spot-repair enameling yourself.
Clear epoxy coatings like those used in some marine equipment refinishing offer better flexibility than enamel. They expand and contract with temperature cycling more gracefully. Products like Rust-Oleum Protective Enamel hold on galley stoves for 18 to 24 months if applied correctly. Application requires careful surface prep: strip all old coating with naval jelly and fine steel wool, degrease with acetone, then apply thin even coats. Cost is $15 to $20 per application, and you’ll need to reapply annually in active saltwater environments.
Oil barrier methods use food-safe mineral oils or specialized marine penetrating oils to create a physical moisture barrier without adding coating thickness. This is reversible — you’re not committing to a permanent finish. Reapply every two to three weeks during active cruising season. It’s labor-intensive but allows visual inspection of underlying metal at all times. That’s the transparency that matters when saltwater is your enemy.
What fails catastrophically: cheap spray paints, vinyl-based marine coatings, and any product that doesn’t specify salt-spray testing. I watched someone coat their galley stove with basic Rustoleum from a hardware store. It bubbled and peeled within six weeks. The difference between hardware-grade and marine-grade products is the difference between temporary and durable protection — don’t underestimate this gap.
My recommendation: keep the factory enamel if it’s intact. Supplement with oil barrier maintenance. If enamel is already failing, commit to annual epoxy recoating or switch to the oil barrier method and inspect monthly.
When Rust Is Already There — How to Arrest It
Caught early, rust responds to mild intervention. Delayed action requires aggressive removal with risk of permanent metal loss.
Surface rust — the orange discoloration stage — responds to white vinegar soaks. Soak a cloth in white vinegar, wrap it around the affected area, and leave it for two to four hours. The acetic acid converts rust chemically. Wipe clean, dry immediately, and apply protective coating. Cost is negligible — a gallon of white vinegar is $3 to $4, and one gallon handles dozens of treatment sessions.
Fine steel wool (0000 grade, not coarser) removes surface rust without damaging underlying metal or factory enamel coatings. Work gently, in the direction of any existing grain, for 10 to 15 minutes. Again, follow with naval jelly if rust persists, then dry and coat thoroughly.
Pitting — actual holes in the metal — requires harsher removal. A rotary wire brush attachment on a drill removes rust and pitted material efficiently. This is aggressive. You’re removing metal, not just corrosion. Use this only when the pitted area represents less than 20 percent of the component’s surface. Beyond that threshold, replacement makes more sense than restoration.
Naval jelly after aggressive rust removal is essential. It neutralizes any remaining corrosion chemistry and prevents flash rusting — immediate re-oxidation that happens on bare steel exposed to salt air. Apply it, let it sit 30 minutes, then rinse and dry thoroughly. This neutralization step separates successful restoration from rust that returns within weeks.
Deep pitting, structural corrosion (rust that penetrates through the metal), or corroded fuel lines demand replacement. Don’t try to salvage a burner grate that’s corroded through, or a valve handle with active pitting that affects structural integrity. Replacement parts for marine stoves run $30 to $150 per component but last years with proper maintenance. That investment pays for itself in peace of mind alone.
Caught early, rust becomes a 20-minute maintenance task. Ignored, it becomes equipment replacement and safety compromise.
“`


Stay in the loop
Get the latest sail the seas mag updates delivered to your inbox.