How to Tell If Your Standing Rigging Is Actually Loose
Standing rigging has gotten complicated with all the conflicting advice flying around — tighten this, don’t touch that, sail it loose, sail it tight. I learned everything there is to know about sailboat stays and shrouds the hard way, 200 miles offshore, where “I’ll look at that when I get back to the dock” stops being an option. Today, I will share it all with you.
Start with your ears. At anchor, boat rocking gently, a properly tensioned upper shroud makes almost no noise. A loose one slaps the mast. That dull, irregular thumping in the middle of the night isn’t the harbor being noisy — it’s your rig moving against its attachment points, grinding through fatigue cycles you can’t see. Light wind underway, minimal heel — if you hear the rig talking, something is too loose.
The beer-can squeeze test is where most cruisers go next, and honestly it works. Grab a shroud midway between the upper and lower chainplates. Squeeze it the way you’d test whether a beer can has gone soft. More than roughly a quarter-inch of give? That’s slack. A properly tensioned shroud barely moves. Not stiff as a steel rod, but definitely not spongy. Do both port and starboard — asymmetrical tension creates uneven mast loading, which is actually worse than moderate under-tensioning on both sides simultaneously.
Underway is where loose rigging really shows itself. Leeward shrouds sag slightly as the boat heels — that’s normal, that’s physics. But a leeward lower shroud that goes completely slack, forming a lazy S-curve in the wire? That’s a real problem. Same story with the forestay. A degree or two of sag in flat water is fine. Visible sag that compounds as you add sail area means your headboard is absorbing loads it was never designed to handle.
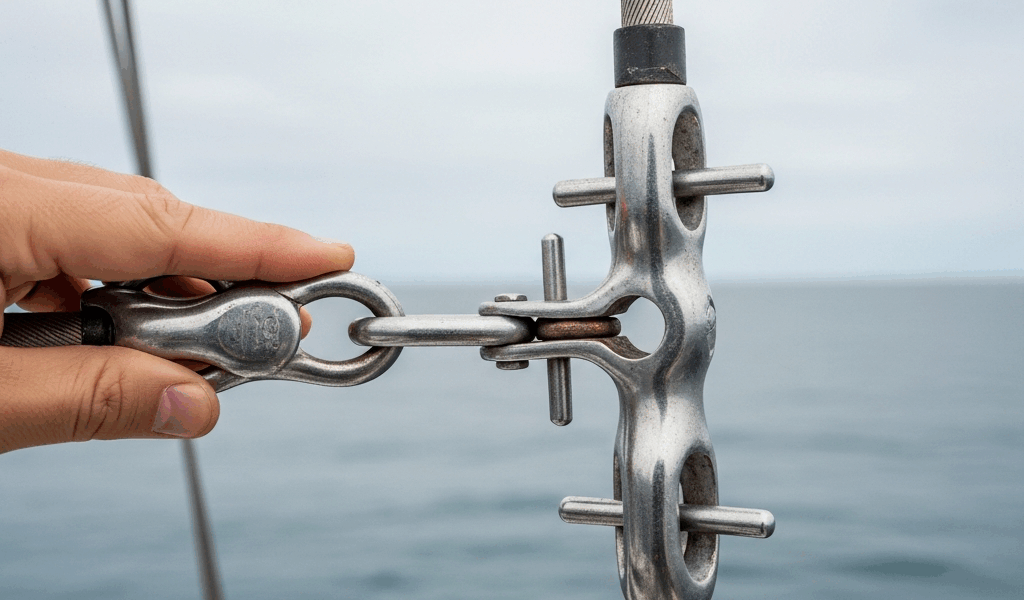
Now here’s the part I probably should have opened with, honestly. Toggle pins — those small hinged connections at the upper and lower chainplates — should move freely but smoothly, with no vertical play. If a toggle pin rocks side to side, or you can see the clevis pin is bent, or the cotter is missing entirely, write that down before you touch anything else. A missing cotter pin or corroded clevis accounts for maybe half of the “my shrouds are loose” problems I’ve personally seen. Don’t make my mistake — I spent 45 minutes tensioning a starboard upper once before I noticed the bottom clevis was barely hanging in there.
Chainplate movement is different from shroud slack and usually more serious. Walk the deck, look at each chainplate base. Flush with the deck surface, or sitting in a small depression? Press down firmly beside it — does the surrounding deck flex? Does it creak? That’s not a rigging problem. That’s a structural problem, and over-tensioning a shroud attached to a failing chainplate makes everything worse, faster.
Check These Components Before Touching the Turnbuckles
Tensioning a shroud on a cracked swage fitting is like sanding a hull with a hammer. You’re applying force to the wrong part of the system entirely. Five minutes of hardware inspection before you turn a single barrel can save you from accelerating a failure you didn’t know existed.
Cotter pins first. They cost about 50 cents apiece. They corrode. They fall out. Grab each clevis pin — top and bottom of every shroud attachment — and wiggle it. Movement up and down means the cotter is missing, too short, or has lost its spring from corrosion. Corroded cotter pins look dull, often with a chalky white or greenish crust. Pull them, replace them with new 316 stainless of the same diameter. Every time. No exceptions.
Toggle pins are next. The horizontal bolt running through each toggle should be a snug fit — no daylight between the pin and the bore of the hole. If you can rock the toggle and see movement, the pin is worn. That play travels directly up the shroud as fake slack you can’t correct by tightening the barrel. The fix is usually a slightly oversized replacement pin, sometimes a thin shim. But the critical thing is recognizing that you’re looking at a mechanical wear problem, not a tension problem.
Swage fittings — where wire rope terminates into compressed stainless end caps — fail in two ways worth knowing. Hairline cracks appear at the junction where the swage meets the wire, usually on the aft-facing side on uppers and lowers. Small, easy to miss. They grow. Second failure mode: the swage separates from the wire entirely when the original compression job was done badly. Run your fingers down every stay and shroud. Pits, rough spots, wire starting to poke through the exterior — all stop signs. Under deck light, look at the swage profile. Smooth and symmetrical means fine. Lumpy, cracked, or visibly asymmetrical means call a rigger. A tighter turnbuckle won’t fix a compromised swage terminal.
Roller furler connections are their own category. The masthead swivel should have zero play — grab the foil and try to move it. Nothing. The lower connection where the furler foil meets the forestay piston should be equally solid. A loose furler attachment means the forestay itself can’t hold consistent tension because the geometry is shifting at the ends.
How to Retension Shrouds and Stays Step by Step
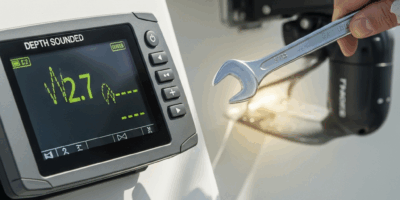
Hardware checks out. Here’s the actual process. You’ll need a small adjustable wrench, a flathead screwdriver, and something to write on. A second person helps significantly. The best conditions are light air at the dock — not anchored in a rolly anchorage, not underway.
So, without further ado, let’s dive in.
Find the upper shroud turnbuckle on the starboard side. Cylindrical barrel, wrench flats on the body, locknuts threaded onto both ends. Before rotating anything, check those locknuts. Loose locknuts mean the barrel will spin freely under load and lose whatever tension you dial in. Snug them by hand, then a quarter-turn with the wrench. Not gorilla-tight — just enough to hold the barrel against motion.
One full turn on the barrel. Stop. Walk forward and look up the mast track from deck level. The spar should be straight athwartship. Canting toward starboard? You’ve over-tensioned the starboard side. Come back a half-turn. The goal here is equal port-to-starboard tension and a mast that hangs plumb — not a specific torque number, just symmetry you can see.
Beer-can squeeze after every three or four turns. You’re hunting for snug without unyielding. That usually takes several small adjustments per shroud rather than one large one. Take your time. A mast tuned in a hurry is usually tuned wrong.
Once the uppers feel even, move to the lowers. Lower shrouds govern mast bend and interact directly with backstay tension — too loose and the column flexes under sail load, which dumps forestay tension. Over-tighten them and you’ve restricted the intentional bend your sail design requires. Same process: small increments, mast check, repeat.
Forestay last — or sometimes you’ll realize halfway through that the forestay was the problem all along. That’s what makes the forestay endearing to us cruisers: it controls everything forward and influences how every other adjustment behaves. Under-tensioned forestay means headstay sag in light air that no lower shroud adjustment can correct. Check the furler connection again first. Then two turns on the lower turnbuckle at the stem fitting. Sail it for an hour. A properly tensioned forestay on a 40-footer should show almost no vertical sag in 10 knots of breeze. Six inches of sag in those conditions? Something is significantly under-tensioned.
I’m apparently a “make one change, sail it, come back and reassess” person, and that approach works for me while single-session full-rig retensioning at anchor never really does. The rig needs to load under actual sailing conditions to settle. What feels right at the dock shifts once the sails fill and the hull starts moving. Build in that feedback loop.
For precise measurement, a Loos gauge — around $400 for a decent one, the PT-2 model handles most wire sizes — reads wire tension in pounds per thousand square inches of wire cross-section. On a 40-foot cruiser with 5/16-inch wire, you’re generally targeting somewhere between 700 and 1,200 depending on your specific rig geometry and the designer’s spec sheet. A rigger will have one and can set everything to factory numbers. Honestly, most cruisers never need that level of precision. The squeeze test and a straight mast gets you to 95 percent of optimal without spending the afternoon with a gauge.
When the Problem Is the Chainplate Not the Rigging
But what is a chainplate failure? In essence, it’s a structural connection losing its integrity while still appearing functional from the outside. But it’s much more than that — it’s the scenario where tensioning your shrouds actively worsens the problem you’re trying to solve.
Chainplates bolt to hull structure, often through a backing plate below decks. When those bolts work loose — or when the backing plate corrodes through, or when the hull-to-deck joint around the base starts cycling — the connection goes unstable. Shroud tension can’t hold because the anchor point itself is moving. You tighten the barrel, the chainplate shifts, the tension bleeds off. Repeat indefinitely.
Below decks, look up at the underside of each chainplate backing plate. Still tight against the hull? Any corrosion weeping — that telltale green or white staining running down from the bolt holes? That’s salt water attacking the fasteners from inside, and fresh active staining means the process is ongoing. Some older staining is normal. Active, damp, mineral-crusted staining around a structural fastener is a different conversation.
On deck, press down on the liner or deck surface beside each chainplate base. Flex, creak, soft spot — that’s delamination, almost certainly with wet core underneath. The deck isn’t just cosmetic there. It’s transferring rig loads into the hull. Wet, delaminated core can’t do that job.
Short-term and on the water: tension only to what’s safe, avoid heavy air, get to a yard. A rigger can re-drill and re-bolt chainplates, install new backing plates, or glass in reinforcement if the surrounding structure has deteriorated. This isn’t a quietly-tighten-everything-and-sail-another-season situation — it’s the kind of problem that announces itself catastrophically if you ignore it long enough.
When to Stop and Call a Rigging Professional
Some problems you fix at the dock with a wrench and a box of new cotter pins. Some problems you photograph, write down, and hand to a rigger before you leave the slip.
Cracked swage fittings. Bent toggles. Corroded clevis pins that won’t back out without tools. Any visible movement in the mast step — that aluminum or stainless base where the spar sits on the keel structure. Chainplate separation visible from deck. Dents or visible cracking in the mast column itself. These are all full stops. You don’t sail offshore on a rig showing any of those symptoms.
A single shroud re-termination with a new swage fitting runs roughly $300–$500 per side depending on wire diameter and where you’re hauled. Chainplate re-bolting typically costs $400–$800 per plate. A full professional rig tune on a 40-footer — where a rigger goes up the mast, inspects all terminals, measures tension with a Loos gauge, and sets everything to spec — runs somewhere between $1,000 and $2,500. That’s real money. It’s also considerably less than a new mast, new standing rigging, and the cost of getting towed in from wherever the failure happened.
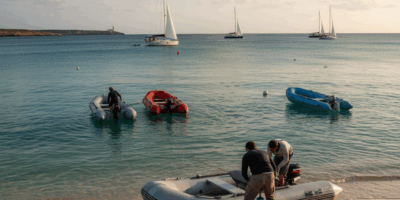
Frustrated by expensive surprises on the hard, most experienced offshore sailors eventually develop a pre-season ritual using a simple dock checklist before any bluewater passage. This new habit took hold several years into their sailing careers and eventually evolved into the systematic pre-departure inspection that serious cruisers know and swear by today.
What you’ve done by checking hardware, running the squeeze test, and catching this at the dock — that’s the whole game. The worst version of this story involves a loud bang 600 miles from anywhere, followed by a mast that’s no longer vertical. Finding it now, while you’re tied to a dock within walking distance of a rigger, means you go sailing instead of going swimming. Make the call.


Stay in the loop
Get the latest sail the seas mag updates delivered to your inbox.