“`html
Locate and Assess the Leak Source
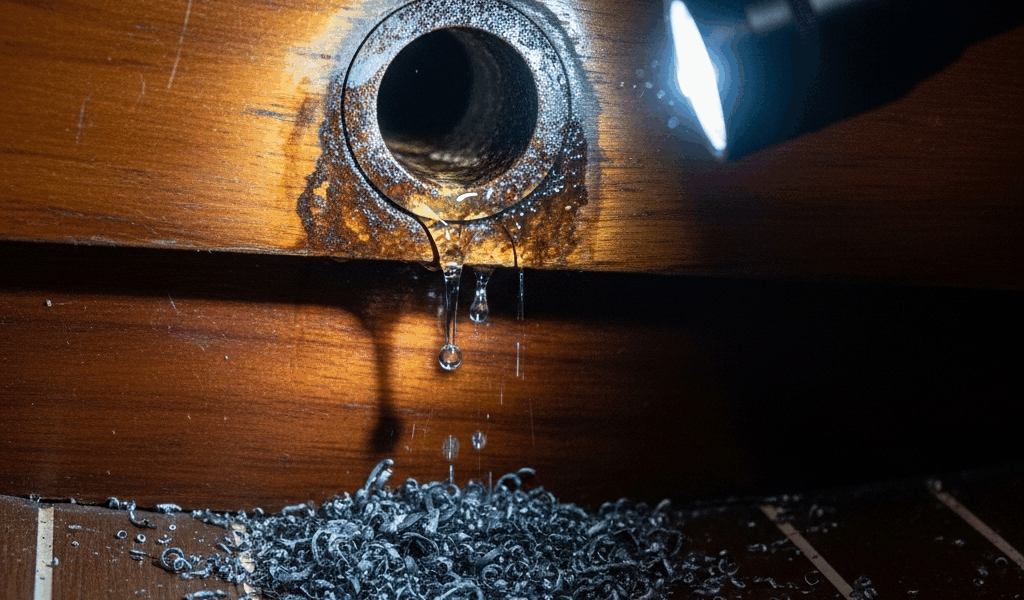
Through-hull fitting leaks on sailboats have gotten complicated with all the different failure modes flying around — but finding where the water’s actually coming in is the first step. I learned this the hard way during a delivery passage from Puerto Rico when I woke at 0300 to bilge alarms screaming and absolutely no visual clue about which of our five through-hulls had decided to betray us.
Get a headlamp and head to the engine room or cabin sole where each fitting terminates. Look for active dripping, corrosion staining, or wet deck timber. Water pooling around the fitting base? That’s your culprit. If nothing’s obvious, use the pressure test method: close each seacock in sequence while watching the bilge pump discharge rate. When the leak stops, you’ve found it.
Now distinguish between weeping and steady flow. A slow drip — maybe one drop every ten seconds — is annoying. Warrants a repair schedule. Not an emergency. A steady stream the size of a pencil? That’s urgent. That’s seeking shelter urgent.
The head seacock fails most. It gets opened and closed constantly. Raw water intakes fail from corrosion inside the valve itself. Galley drains? They clog with debris and corrode from the inside out. The occasional cockpit drain does the same.
Check the seacock handle. Can you move it smoothly? A stuck or rough seacock often means internal corrosion or barnacle growth inside the barrel. The fitting itself — the bronze or plastic thru-hull below the valve — may also be corroded at the shoulder where it exits the hull. This shoulder zone is where saltwater sneaks past caulking compound.
Immediate Temporary Fixes Underway
Trapped offshore with steady flow and no harbor within twenty hours? You need a temporary fix that buys time. I’ve used all three methods. None are permanent. All require you to monitor the bilge religiously.
Wooden plugs work when the leak is small enough to stuff something into it. Carve or whittle a hardwood dowel — I’ve used oak dowels from the spares kit, typically 1/2-inch or 5/8-inch diameter — to fit snugly in the thru-hull opening. Hammer it in with a small block and mallet. This works best if you can reach the thru-hull from above deck or below-decks on the cabin side. Wrapping the plug with Teflon tape before driving it home helps create a tighter seal. A wooden plug in a 1-inch thru-hull might hold for 48 hours before water seeps around the edges.
Epoxy putty — I carry two packs of Subdue or similar waterproof epoxy — adheres to wet surfaces and cures fast. Twenty to 30 minutes for a surface set, full strength in 24 hours. Knead it thoroughly, press it into and around the leaking fitting while the putty is still pliable, then shape it flush. This is messy. It works when the fitting body itself is intact but the bedding compound has failed. Don’t expect this to hold if the thru-hull is cracked. Temporary life span: 5 to 14 days depending on water pressure and sea state.
Wrap-and-clamp is the muscle method. If the leak is at the thru-hull shaft just below the cabin sole, wrap the fitting with several layers of fiberglass tape, marine cloth, or even denim soaked in epoxy resin. Once the epoxy sets, clamp a hose clamp or two around the wrapped section as tightly as you can tighten it by hand. This crushes the cloth against the corroded or cracked fitting. I’ve used this on a corroded seacock shaft on a 48-foot ketch; it held for three weeks until we reached Bermuda. The downside: you must be able to access the fitting from inside the cabin, and the wrapping adds bulk that might interfere with the seacock handle.
Probably should have opened with this section, honestly — the one thing that kills all three methods is complacency. Your temporary fix isn’t a solution. It’s a bridge to a real repair. Check your bilge every hour underway. Keep the engine running if you’re motoring. If the leak rate accelerates, haul up the genoa and head for the nearest harbor under sail.
Permanent Repair Step by Step
You’ve hauled the boat or you’re at a dock with a diver standing by. Time to do it right.
What you’ll need: new seacock (Groco, Forespar, or Sparton — bronze for saltwater, rated for your thru-hull diameter: 1-inch, 1.25-inch, etc.), new thru-hull fitting if the old one is cracked or severely corroded, Sikaflex or 3M 5200 bedding compound, stainless steel hose clamps (two minimum per fitting — the double-clamp rule), hacksaw or recip saw, chisel, propane torch (optional but useful for corrosion removal), wire brush, sandpaper, anti-seize compound.
Step one: close the seacock and cut the hoses. Use a hacksaw on the hose clamps if they’re corroded and won’t budge. Pull the hoses away. Get a bucket under the opening — old seawater will drain out.
Step two: remove the seacock itself. Most seacocks thread into the thru-hull body or bolt to it with two stainless bolts. Use two wrenches — one on the fitting body (topside) and one on the seacock. Loosen and unscrew. If it’s stuck, wrap the fitting body with a damp rag and hit it with a propane torch for 30 seconds to expand the fitting. Wait. Try again.
Step three: inspect the thru-hull from outside the hull (if hauled) or from inside the cabin. Look for cracks in the plastic or corrosion on bronze. If the fitting shoulder — the thick part where it exits the hull — is pitted or thin, replace it entirely. You’ll need to knock out the old one. Use a chisel and hammer, or drill it out with progressively larger bits. Remove all old bedding compound and caulk around the hull opening. Scrape to bare gelcoat or wood.
Step four: apply new bedding compound around the thru-hull opening and insert the new fitting (or the cleaned old one if it’s sound). Let the compound ooze up around it — this is your waterproof seal. Do not skimp on bedding compound.
Step five: thread or bolt the seacock back on. The seacock handle should point toward the hose when open (parallel flow) and perpendicular when closed. Tighten the connection firmly but not brutally — you can crack the seacock barrel.
Step six: hoses. Cut new hose (marine-grade silicone or reinforced rubber, minimum 1.5-inch ID for a 1-inch fitting). Slide the first stainless clamp over the hose, push the hose onto the seacock outlet, then tighten the first clamp one-quarter inch from the hose end. Slide the second clamp over, position it one inch away from the first, and tighten. Both clamps tight. This is why double-clamping matters — if one corrodes through, the second holds pressure.
The same process applies to the thru-hull intake on the engine. Raw water seacocks see constant flow and higher corrosion rates. Replace the hose every five years even if it looks fine.
When to Haul vs. When You Can Repair Afloat
Decision framework: assess the leak rate, your location, and sea state. If you’re in the shipping lanes with a steady drip and calm seas, you can often patch afloat and sail to a haul-out facility. If you’re 400 miles offshore in a building gale with a leak soaking the aft cabin sole, you have a different problem entirely.
Haul immediately if any of these apply: the thru-hull is cracked, the hull around the fitting shows osmotic blistering or delamination, the fitting shoulder is deteriorated, or you have multiple simultaneous leaks. A cracked thru-hull will not hold a temporary patch. Osmotic blistering means structural water intrusion; you need a surveyor and a serious repair. Deteriorated fitting shoulders indicate the hull material itself is compromised. Multiple leaks suggest systemic corrosion — fix one, another fails. Head to a yard.
You can often repair afloat if: the leak is a single thru-hull, the fitting itself is intact, your temporary patch holds for 48+ hours, and you’re within 200 nautical miles of a haul-out. Patch, motor or sail carefully to the yard, and repair properly on the hard.
Hauling costs run $1,500 to $4,000 depending on your boat’s beam and the facility. Hauling for a two-day thru-hull replacement isn’t efficient. Haul when you have a list of jobs — but never, ever ignore a fitting that’s actively leaking salt water into your bilge. That leads to through-hull failure. That leads to sinking.
Prevention and Annual Maintenance
The best through-hull leak is the one that never happens. This means annual inspection and intelligent material choices.
Every winter or spring, close each seacock, wait five minutes, and check for drips. Open each one slowly and make sure the handle moves smoothly. A rough or sticky seacock needs replacement. Do not defer. A seacock that’s hard to operate will eventually be forced, which can crack the barrel or strip the threads.
Replace seacocks every seven to ten years on a boat in saltwater. Replace thru-hulls every 15 to 20 years unless they show corrosion. Bronze or nickel-plated brass seacocks resist corrosion better than plastic or chromed steel. Avoid plastic thru-hulls in through-hull fittings carrying engine raw water — the combination of heat and flow accelerates plastic degradation.
Corrosion protection: install zinc anodes at the through-hull cluster if your boat is metal-hulled and in saltwater year-round. For fiberglass hulls, Tef-Gel or a similar anti-seize compound applied to the seacock threads every two years prevents galvanic corrosion. Use stainless steel hose clamps, not galvanized. Galvanized clamps corrode in five years. Stainless lasts 15 to 20.
Keep a spare seacock kit aboard — one 1-inch seacock, bedding compound, Teflon tape, hose clamp assortment. The kits weigh almost nothing. They’ve saved me twice.
“`


Stay in the loop
Get the latest sail the seas mag updates delivered to your inbox.